Discover the secrets to making perfect crispy dosas with our authentic dosa recipe. Perfect for breakfast or any meal, that can be paired with a variety of chutneys and sambar.
Craving a delicious, crispy dosa that transports you straight to the bustling streets of South India? You’re not alone! Dosas are beloved for their thin, golden crust and endless versatility. However, many home cooks struggle to achieve that perfect balance of crispiness and flavor. Perhaps your dosas turn out too thick, or the batter just doesn’t seem right. This can be frustrating, especially when you want to impress family and friends with authentic Indian cuisine.
In this blog post, we’ll guide you through an authentic dosa recipe that ensures perfect crispy crepes every time. From soaking and blending the ingredients to mastering the cooking technique, you’ll learn all the tips and tricks needed to create dosas that rival those from your favorite restaurant. Get ready to elevate your cooking game and enjoy this authentic dosa recipe in the comfort of your own home!
Understanding Dosa
What is Dosa?
Dosa is a thin, crispy crepe made primarily from fermented rice and urad dal (black gram). Originating from South India, this delightful dish is not just a breakfast staple but a versatile accompaniment to a variety of meals. Whether served plain, with a stuffing, or as a vessel for savory fillings, dosas are beloved for their taste and texture.
Types Of Dosas
- Plain Dosa: The traditional version, enjoyed for its simplicity.
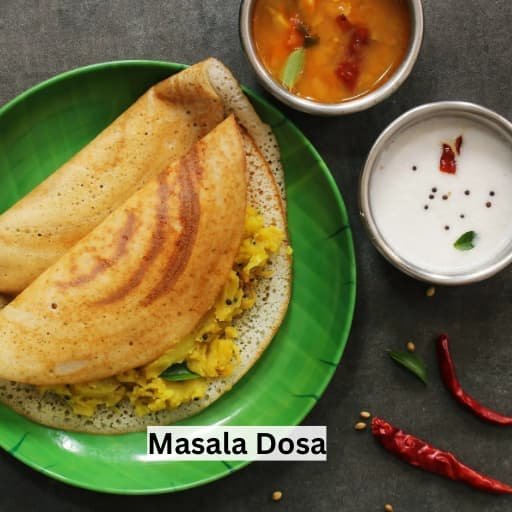
- Masala Dosa: A stuffed dosa filled with spiced potatoes and onions.
- Rava Dosa: Made from semolina, giving it a unique texture.


Ingredients
To make this authentic dosa recipe, you’ll need a few key ingredients:
- Rice-1 cup: Typically, a combination of regular rice and parboiled rice is used for the best texture.
- Urad Dal-1/2 cup: This ingredient gives dosas their characteristic flavor and helps with fermentation.
- Water: Essential for soaking and blending the ingredients.
- Optional Ingredients: You can enhance flavor with spices like cumin or black pepper, or even herbs like curry leaves.
The fermentation process is crucial, as it not only helps the batter rise but also develops the flavor.
Preparing the Dosa Batter
1.Soaking the Ingredients

The first step in this perfect dosa recipe is soaking the ingredients. Start with about 1 cup of rice and ½ cup of urad dal.
- Soaking Time: Rinse the rice and dal thoroughly, then soak them in separate bowls for at least 4-6 hours or overnight. If you’re short on time, a minimum of 2 hours can work, but longer soaking yields better results.
- Choosing the Right Rice and Dal: For best results, use a combination of short-grain rice (like idli rice) and urad dal. This combination helps create the right texture.
2.Blending the Batter
After soaking, it’s time to blend your ingredients into a smooth batter.
- Equipment Needed: While a high-powered blender can work, a traditional wet grinder is ideal for achieving the perfect consistency.
- Blending Tips: Drain the soaked ingredients and add them to your blender or grinder. Gradually add water to achieve a thick but pourable consistency. The batter should be smooth, with a slight graininess—this texture is key for crispy dosas.
- Fermentation: Once blended, transfer the batter to a large bowl, cover it, and let it ferment in a warm place for 8-12 hours. The batter should double in size and develop a slightly tangy aroma.


3.Cooking the Dosa
Getting the Perfect Tawa Ready
The next step in this dosa recipe is cooking your dosas. A cast-iron tawa or non-stick skillet works well for this purpose.

- Preheating Tips: Heat your tawa on medium-high until it is hot. You can test the temperature by sprinkling a few drops of water on the surface; if they sizzle and evaporate quickly, it’s ready.
- Oiling the Surface: Lightly grease the tawa with a few drops of oil using a paper towel or half an onion. This helps prevent sticking and promotes even cooking.
Ladling and Spreading the Batter
Now it’s time to pour and spread the batter to create your dosa.
- Pouring Technique: Take a ladleful of the fermented batter and pour it in the center of the hot tawa.
- Spreading the Batter: Using the back of the ladle, spread the batter in a circular motion from the center outwards to form a thin circle. The thinner the dosa, the crispier it will be!

Cooking to Perfection
Cooking the dosa is where the magic happens.
- Cooking Time for the First Side: Let the dosa cook for about 1-2 minutes on medium heat. You’ll see the edges lifting and the surface becoming slightly dry.
- Flipping the Dosa: When the bottom is golden brown, gently lift the edges with a spatula and flip it over to cook the other side for another 30 seconds to a minute.
- Signs That the Dosa is Ready: The dosa should be crispy and golden brown. If you prefer a softer texture, you can remove it sooner, but for that perfect crispiness, ensure it’s well-cooked.
Serving Suggestions
Accompaniments
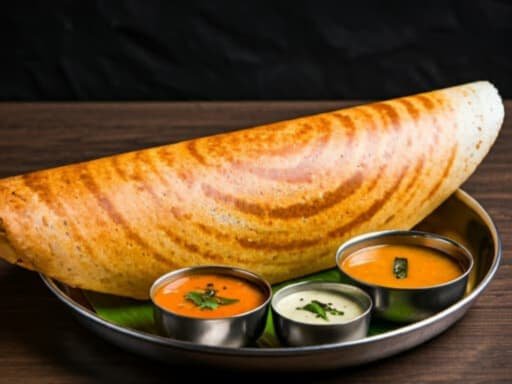
Dosas are traditionally served with various accompaniments, enhancing their flavor.
- Chutneys: Coconut chutney, tomato chutney, and mint chutney are popular choices that complement the dosa beautifully.
- Sambar: A lentil-based vegetable stew, sambar is often served alongside dosas, adding a delightful contrast in flavor.
Creative Variations
Once you master the basic dosa, try some fun variations!
- Stuffed Dosa Options: Masala dosa is a classic filled with spiced potatoes and onions. Simply prepare the filling separately and add it to the dosa before folding.
- Healthier Versions: For a twist, try using whole grains or adding finely chopped vegetables to the batter for extra nutrition.
Solution To The Most Common Issues
Even seasoned cooks encounter challenges while making dosas. Here are some common problems and solutions:
- Dosas Too Thick: If your dosas are turning out thick, your batter may be too thick. Add a little water to adjust the consistency.
- Batter Not Fermenting: If your batter doesn’t rise, it might be due to cold temperatures. Try placing it in a warmer area or using a fermentation setting if your appliance has one.
- Dosas Sticking to the Pan: Ensure your tawa is hot enough and properly greased. If you’re using a non-stick pan, check that it’s in good condition.
Conclusion
Making authentic dosas at home is not only rewarding but also a delightful culinary adventure. By following this guide, you can master the art of dosa-making, ensuring perfect crispy crepes every time. With a little practice, you’ll be able to impress family and friends with your skills, serving up delicious dosas with an array of accompaniments.
You can also try different variations and flavors, making dosas your own. Whether you enjoy them plain, stuffed, or paired with your favorite chutneys, there’s no wrong way to savor this beloved dish.